Blueberry Popsicles

Blueberry Popsicles

Today we made some blueberry popsicles.  Luca has a sore throat and was requesting that we make some.  I literally made them in 2 minutes while the kids were in the stroller ready to get some fresh air during our morning walk.  I love blueberries because they are rich in bioflavonoids that are great for lowering inflammation that comes with a  sore throat.  I also love them in the form of an icy popsicle.

Bioflavanoids give blueberries their deep purple color.  In addition to lowering inflammation in the body, I use bioflavonoids for the following: to strengthen blood vessels preventing them from rupturing or leaking such as in varicose veins, hemorrhoids and heart disease; as an antioxidant preventing cells from excessive damage and for enhancing the power of Vitamin C.

A nice little tip about blueberries I love to share with people is that when they are frozen their cells burst and release the bioflavonoids that are so beneficial to health.  This release of bioflavonoids make them easier for you to absorb, especially if you struggle with digestion.  Anther quick tip, if you do not have a high powered blender at home, just freeze your kale ahead of time.  Freezing the greens will burst the cells just like frozen blueberries.  The cells will burst and will blend smoothly rather than having fibrous pieces of kale in the popsicle.

Enjoy!

3 cups frozen blueberries or frozen fruit of your choice
3 cups rice milk or milk of your choice
2 cups packed spinach or kale

  1. In a high powered blender, combine all ingredients and blend until smooth.
  2. Pour liquid into popsicle containers and freeze approximately 5 hours.
Spring Greens

Spring Greens

Etta and Luca found the Spring greens delectable this past weekend. We went outside between rain showers to bring in Swiss chard, mustard greens and mizuna from our mesclun mix we planted in the Fall. Mesclun is a mix  of young greens ranging from mild to spicy. Many seed companies will make their own signature mesclun mix.  Spring is a perfect time to plant a mix that suits your taste buds as a way to add more leafy greens to your diet. I often recommend leafy greens for many reasons.  Leafy greens are rich in calcium, magnesium, potassium and iron, which make them excellent for the treatment of muscle spasm, constipation, and iron deficiency anemia. Plant based iron is more difficult to absorb compared to iron from red meat so just add lemon to the greens as Vitamin C will help iron to be absorbed in the small intestine.  You can also purchase an organic Spring mix from your local grocery store or farmers market if you do not have a garden.

A little side note, for those individuals who have hypothyroidism, I recommend they limit goitrogenic foods like spinach, cabbage, broccoli and soy (for a more complete list visit whfoods.com and type in goitrogenic foods).  These are typically wonderful for your health, however if you have hypothyroidism, goitrogenic foods can block the production of thyroid hormone.  Steaming goitrogenic foods will reduce their goitrogenicity.  Now say that three times!  Here is a quick salad I made for my family.

Enjoy!

Serves: 4-6

Salad:

5 ounces spring mix
10 medium to large organic strawberries, hulled and sliced
1/4 cup raw or roasted sunflower seeds
Sea salt to taste
Fresh ground pepper to taste

Dressing:

1/4 cup extra virgin olive oil
2 tablespoons balsamic vinegar
1 tablespoon Dijon mustard
2 tablespoons coconut or dairy kefir

  1. In large salad bowl combine the spring mix and strawberries.
  2. In small jar combine the dressing ingredients and whisk until we’ll blended.
  3. Add the desired amount of dressing to the salad mixture and toss. Sprinkle with sunflower seeds salt and grind some fresh ground pepper and serve.


Robust Tomato Soup

Robust Tomato Soup

Last night we invited our good friends Heather and Jon over for an impromptu dinner. I found Heather painting the grape hyacinth flowers my daughter Etta and son Luca picked for her the evening before. It was that perfect spring day in Washington where the weather was fickle, alternating between a sprinkle of rain to warming sunbursts.  I decided to make tomato soup and fresh pesto with a dollop of homemade coconut kefir for our guests. You can use my pesto recipe and homemade coconut kefir from earlier posts.

This meal is low glycemic and good for individuals who struggle with blood sugar control.  I would not recommend this for those individuals who have rheumatoid arthritis or eczema or other inflammatory conditions as the tomato is a nightshade and may increase your symptoms. We have a small garden on the south side of our home.  The winter greens are beginning to burst with fresh foliage.

I love watching Luca munch on the greens pretending to be one of the deer that frequent our fenced in miniature garden.  Remind me to have my husband Tony build a 10 foot fence next year, as apparently this is the height you need to keep the deer out of your garden in North Tacoma!  Or I could just be at peace with the fact that the deer were here before we were and therefore I need to just plant more kale.  Lots more!

Before Jon and Heather went home that evening they asked me for the recipe so here it is. Enjoy a steaming bowl of robust tomato soup while watching your deer consume all your spring vegetation.  Hopefully with peace in your heart.  This recipe freezes well so if you are a small household just make one batch.  If you are a large household or are cooking for a bigger crowd, double or triple the batch.

Serves: 6-8

3 tablespoons extra virgin olive oil
1 onion, diced
8 cloves garlic, minced
1 teaspoon dried oregano
1 teaspoon dried thyme
1 sprig fresh or 1 tablespoon dried rosemary, remove stem from fresh
6 medium carrots, ends removed and grated
4-28 ounce cans diced tomatoes (I use the BPA-free canned tomatoes, usually labeled on the can)
32 ounces of organic chicken or vegetable broth
sea salt to taste
fresh ground black pepper to taste

  1. In a large pot over medium heat, warm the olive oil.  Sauté the diced onions and garlic until onions are translucent, approximately 5-7 minutes.  Add the herbs and grated carrot and sauté an additional 5 minutes.
  2. Next, add the cans of diced tomatoes, chicken broth, sea salt and pepper.  Bring to a boil then reduce to a simmer until the soup reduces in liquid and the carrots are well cooked, approximately 45 minutes.  Dollop fresh pesto and coconut kefir as condiments and added nutrients!  You could even use raw or roasted sunflower or pumpkin seeds to sprinkle over the soup.

Enjoy!


Coconut Milk Kefir

Coconut Milk Kefir

A major part of my practice involves nutrition counseling on how to create a healthy digestive tract, which in turn typically results in increased vitality.  I have always encouraged my patients to increase probiotics in their daily lives.

Probiotics are important to our health for many reasons.  Probiotics help to maintain a healthy balance of good bacteria that prevent disease causing bacteria and yeast from becoming too prolific in our gut.  They also increase our ability to absorb nutrients such as B vitamins and calcium from our food.  I typically will start with a quality probiotic in supplement form if there is a history of multiple antibiotic use, digestive complaints, food sensitivities, and a history of yeast or fungal infections.  While they are increasing their probiotics in supplement form, I then counsel them on getting their probiotics from food sources, namely fermented foods.  I love to incorporate nutrition from whole food as a practical way to reduce medication and supplement dependency.

Fermented foods are not widely consumed in our culture, no pun intended.  Major sources of fermented foods include kefir, sauerkraut, kombucha and kimchi.  I have found that using a food source like kefir in my smoothies, salad dressings or dolloped on soup like my Robust Tomato and French Lentil soups, makes eating probiotic rich food practical.

I love kefir as it has significantly more strains of bacteria and yeast that can colonize the gut.  Though yogurt is a beneficial probiotic source, it has not been shown to colonize the gastrointestinal tract.  So when I want patients to have a power punch of probiotics, I use kefir.  I purchased my kefir starter from Body Ecology online.  You can also purchase kefir starter or kefir granules at most local health food stores or co-ops.  Begin with a couple of tablespoon of kefir to see how you tolerate this probiotic rich food.

Kefir traditionally is fermented cow or goat milk.  For individuals who do not tolerate dairy, an alternative can be useful.  I have found that some patients who are dairy intolerant can tolerate kefir.  This is usually because the lactose is greatly reduced through the fermentation process.  If you are a person that tolerates traditional kefir, I recommend that you continue to enjoy dairy kefir.  If you find that you react to dairy kefir, here is a simple and fast way to enjoy the health benefits of coconut kefir.

1 packet kefir starter
2 cans coconut milk

  1. In a medium saucepan, heat the coconut milk to 92 degrees Fahrenheit.  Be careful not to overheat as this will kill the starter and prevent the coconut milk from fermenting.
  2. Pour the warm coconut milk in a quart sized canning jar and add kefir packet.  Whisk until evenly blended and then place a lid on the jar.   Keep the kefir at 72-78 degrees Fahrenheit for 18-24 hours.  If you are in a warm environment this will be simple.  If you are in a cooler environment, I recommend doing this early in the morning when your heat is on and you can also put a warmed bean or rice bag around the kefir while intermittently warming the bag when it cools.  Gauge the temp based on the room temp from your thermostat and being careful not to overheat the bean or rice bag. You will know the kefir is done when you smell the coconut milk and it smells like yogurt and when you taste the kefir and it is tart and tangy.
  3. Once the kefir is complete, refrigerate it and enjoy over the next couple of weeks.  The kefir will continue to ferment but at a much slower rate in the refrigerator.  You will know when it is bad when it tastes sour and not tart and tangy fresh.  If  you want to make kefir from your kefir, I have found that one cup of coconut milk kefir is needed.  Just repeat the process with two cans of coconut milk and then add the one cup of coconut kefir to the warmed coconut milk to continue the process.  You will know when you need a fresh packet of kefir starter when your coconut milk  no longer ferments well.

Enjoy!

Vege-full Meatloaf

Vege-full Meatloaf

I love spicing up a traditional recipe. I add lots of vegetables, herbs and spices to enhance this protein rich dish. Protein is a major building block for our muscles, hormones, neurotransmitters and immune system to name a few.  I also love the simplicity and flexibility of  this recipe. Prep time is approximately 15 minutes, an additional bonus.  I always triple or quadruple the recipe to throw three other meals in the freezer for a later date. I freeze the meatloaf raw.  Use any ground meat that you prefer or 3 cups of cooked French lentils for a vegan or vegetarian approach. If you have access to elk or venison, please use these meats as they nourish the blood while being anti-inflammatory. Elk and deer graze on their natural diet of grasses and shrubs, thus concentrating richer amounts of omega 3 and omega 6 fatty acids. Grass fed organic beef is also higher in omegas than grain fed beef.  This translates as being healthier for you by lowering your cholesterol consumption while getting the rich source of iron that meat provides. I will recommend to my patients who are iron deficient to eat meat as heme iron sources are easily absorbed compared to vegetable sources of iron. For those patients who do not eat meat, I simply recommend adding lemon or other rich sources of Vitamin C to their vegetables to help absorb the iron.

Serves: 4

Temp: 350 deg. F

1 pound ground meat
2 cloves garlic, crushed
1/2 onion, diced
1 large carrot, grated
1 cup spinach, chopped
2 tablespoons Worcester sauce
1 teaspoon oregano
1/2 teaspoon ground cumin
1 egg or the equivalent of 2 egg replacers
8 oz. tomato sauce

  1. Combine all ingredients and mix until well blended.
  2. Place meatloaf in a bread pan. Pour 8 ounces of tomato sauce over the top of the meatloaf and bake for 45 minutes or until sides are bubbling and center of loaf is well done.

Enjoy!

Purple Cabbage Slaw

Purple Cabbage Slaw

I grew purple cabbage in the garden this year.  I love going into my raised bed garden and grabbing something fresh and flavorful to add some rich color that vegetables bring to the table.  Purple cabbage, also known as red cabbage, is one of my favorites for many reasons.  The antioxidant rich purple color, the anticancer benefits of the brassica family, l-glutamine, an amino acid, richly found in cabbage that helps to heal the gastrointestinal tract, and last but not least, the crisp, sweet flavor!  Here is a go-to recipe I use frequently for a quick and fresh side for my fish, chicken or vege burrito meals. Enjoy!

1/2 medium head purple cabbage, core removed and shredded (thin slices)
1 lime, juiced
2 tablespoons extra virgin olive oil
1/2 teaspoon sesame oil
fresh ground pepper and sea salt to taste

Combine all ingredients and toss until evenly blended.  You can easily combine purple cabbage, Savoy and green cabbage to create more color and texture.  This particular evening I combined, homemade black beans, organic flank steak, heirloom tomatoes, avocado and cilantro on the bed of slaw and made a salad.  I also sprinkled the salad with raw sunflower seeds.  My taste buds were very happy!  Leave out the flank steak and substitute chicken, fish or no meat for a more anti-inflammatory meal.

Deliciously Gluten, Dairy and Egg Free French Toast

Preheat oven to 350 deg. F

1 cup raw cashews or mix of raw nuts and or seeds of your choice
1 cup rice milk or milk alternative
1 1/2 tablespoon flax meal
1/2 teaspoon cinnamon
1/4 teaspoon nutmeg
1 teaspoon gluten free vanilla extract
4 slices gluten and egg free bread
  1. Lightly oil the bottom and sides of an 8×8 baking dish.
  2. In a food processor or high power blender combine the above ingredient, placing the bread to the side for later. Blend until smooth.
  3. Pour half the batter on the bottom of the baking dish and smooth evenly with a spatula. Place the bread in the dish and pour the remaining batter over the top of the bread and again smooth evenly covering the bread.
  4. Place the French toast in the preheated oven and bake for 20-25 minutes or until the top is lightly golden brown. Serve with all fruit jam and or maple syrup.


Vegan Lasagna

Vegan Lasagna

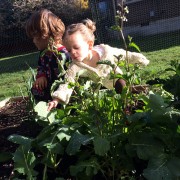
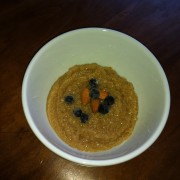
I love this meal for many reasons.  The rich and savory flavors from the robust marinara, the pesto and the mushrooms that infuse into the sweet and creamy cashew cheese are delicious.  I usually make extra and freeze a couple for quick meals in the future.  The cashew cheese is rich in good fats and minerals.  The mushrooms will pack an extra immune punch with their antiviral properties, not to mention they are also rich in chromium, a nutrient that helps to balance blood sugars.  Pesto is an excellent way to eat your greens.  Leafy greens are a great source of calcium, magnesium and potassium for healthy muscles, bones and blood pressure to name a few.  The zucchini replaces the pasta, so relax and enjoy this low glycemic, heart healthy dish!  I did not have a picture of my vegan lasagna so you get a sweet and savory picture of my Etta instead.

Serves: 6

4 cups marinara sauce (see recipe below)
2 cups pesto (see recipe below)
3 cups cashew cheese (see recipe below)
4 medium zucchini, peeled into thin strips
¾ lb mixed mushrooms, crimini and shiitake mushrooms, sautéed (see recipe below)

  1. Preheat oven to 375 ⁰ F.  In a 9 x 13 baking dish, begin layering lasagna beginning and ending with the marinara sauce. Use a quarter of each ingredient per layer.  After the marinara sauce, next layer with the cashew cheese, pesto, zucchini, and then the mushrooms.  Repeat process four times ending with the marinara sauce.
  2. Place the lasagna in the preheated oven and bake for 45 minutes or until bubbling and hot around the edges.

Robust Marinara Sauce

Yields: Approximately 8 cups

1 tablespoon extra virgin olive oil
1 large yellow onion, diced
6 large cloves garlic, diced
1- 28 oz. can diced tomatoes
1- 28 oz. can tomato sauce
½ cup oil packed sundried tomatoes, diced
1 ½ teaspoons dried thyme
1 ½ teaspoons dried oregano
1 teaspoon sea salt or to taste
1 teaspoon fresh cracked pepper

  1. In a large sauce pan over medium heat, sauté the olive oil, onions, garlic, thyme and oregano for approximately 3-5 minutes or until the onions are translucent.
  2. Add the remaining ingredients and stir until evenly blended.  Reduce the heat to medium low and let simmer for 30-40 minutes, stirring occasionally.  Remove from heat and set aside.
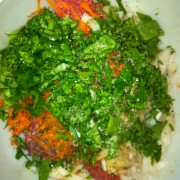
Pesto

Yields: Approximately 2 cups           

2 cups fresh packed basil
2 cups packed arugula, kale (stems removed) or Italian parsley (stems removed)
2/3 cup walnuts
2/3 cup extra virgin olive oil
4 tablespoons fresh lemon juice
2 large cloves garlic
sea salt and fresh ground pepper to taste

  1. In a food processor or high powered blender, pulse the walnuts, garlic and greens until coarsely chopped.
  2. Add the lemon juice then slowly add the olive oil in a thin stream while the food processor or blender is on.  Scrape the sides of the processor occasionally until the pesto is evenly blended.
  3. Sprinkle the salt and fresh ground pepper in the pesto to taste.
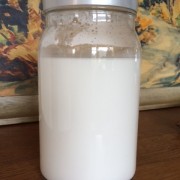
Cashew Cheese

Yields: Approximately 1 ½ cups

1 cup raw cashews
¾ cup water
¼ cup nutritional yeast
½  teaspoon sea salt
3 cloves garlic

  1. In a food processor or high powered blender, combine all ingredients and blend until the consistency of ricotta or until somewhat smooth.

Sautéed Mushrooms

Yields:  Approximately 4 cups

2 tablespoons extra virgin olive oil
¾ pound mixed mushrooms, crimini and shiitake (washed, trimmed and cut into ¼ inch slices)
4 cloves garlic, diced
sea salt and fresh ground pepper to taste.

  1. Over medium heat, sauté the garlic and olive oil for 1-2 minutes.  Add the remaining ingredients and sauté for approximately 8-10 minutes or until mushrooms are tender.  Remove from heat and set aside.


Amaranth Pudding

Amaranth Pudding

I love to make amaranth for a quick breakfast or dessert.  Amaranth is a gluten free whole grain that is native to Peru and was used extensively by the Aztecs.  According to the Whole Grains Council, amaranth has one of the highest protein contents among grains as well as being rich in minerals such as calcium, magnesium, potassium and iron.  I suggest amaranth to my patients for its rich source of protein to help with blood sugar control and as a good gluten free alternative.  I like to use organic canned coconut milk to make it more like a rich pudding after the amaranth has been cooked.  I suggest this to parents when their children need to gain weight or for prevention of weight loss in patients with such diseases as cancer.  To make a lighter version, just use light organic canned coconut milk or any other milk alternative such as almond, rice or hemp.

Enjoy!

Serves: 4

2 1/2 cups water
1 cup amaranth
1 cup canned coconut milk
3 medjool dates, pitted
fresh berries, apples, pears, nuts, seeds or unsweetened shredded coconut to garnish

  1. In a medium covered saucepan, bring the water and amaranth to a boil then reduce to simmer.  Simmer for 15 minutes or until the amaranth has absorbed the liquid.  Remove from heat.
  2. In a blender, combine the coconut milk and medjool dates and blend until smooth.
  3. Pour the blended coconut milk into the amaranth and combine until evenly blended.
  4. Garnish with the desired fruit, nuts,seeds or shredded coconut and serve.
Honey and Cinnamon Baked Pears

Honey and Cinnamon Baked Pears

This is a delicious and nutritious dessert.  It only takes a few minutes to prepare to boot!   The cinnamon is warming and great for blood sugar and digestion.  I leave the peel on the pears for extra fiber and texture.  If you have difficulty with yogurt, I like to substitute with a nut butter like cashew or macadamia.  For baby food, I would leave out the honey and just bake a ripe pear with a little cinnamon and orange juice.  I made this for Etta and she loved it!

Serves: 4

4 ripe Danjou pears, destemmed, cut in half and cored
4 tablespoons honey
2 teaspoons cinnamon
4 Tablespoons lemon juice, fresh squeezed
½ cup orange juice

  1. Preheat oven to 350 ⁰ F.  In a 9×13 baking dish, place pears face down.
  2. In a small mixing bowl combine the honey, cinnamon and lemon and orange juice and mix until evenly blended.  Pour over the pears and bake for 25-30 minutes or until the pears are tender.
  3. Serve face up with a dollop of Greek yogurt and honey and some raw walnuts.